Hi everybody! Today’s post is about installing an ODI 12c standalone agent. This is not a “new” topic and the steps to perform it can also be found at the Oracle site, however it got me a little bit “off guard” when I was requested to install one and the reason is that it changed considerably comparing to ODI11g (and yeah, we still work A LOT with ODI11g, so installing ODI12c agent was “new” for us).
Prior to ODI 12 version, the ODI agent was configured by simply editing a file called odiparams.bat (odiparams.sh in Linux), which would contain all the necessary agent configuration parameters. It was a simple step, where you would enter the ODI master/work configuration, DB/ODI connection users and so on. After that, you would simply run the agent program and that was it, very short and easy to do. However, in ODI 12 version, it changed considerably and now we need to go through two wizard setups, one for creating the necessary pre-requisite DB schema for ”Common Infrastructure Services” and the other one to configure the ODI Standalone agent for us.
This change added some extra complexity to an architecture that was (talking exclusively about ODI Standalone Agent here) very simple to setup in the old days. Although Oracle provides wizards for us to minimize this effort, nothing was easier than simply configuring a parameter file and running a java program. But enough grumbling, let’s see how we may accomplish this task on ODI 12.
The first wizard that we need to run is the Repository Creation Utility (RCU) that is located here at ORACLE_HOME/oracle_common/bin/rcu.bat. Before we run it, we must understand what RCU is and what it can do for us. As its name suggests, it is a utility that may be used to create any repository component required for Oracle Fusion Middleware products, including the ODI Master/Work repository.
In our project, we did not create ODI Master/Work repository with RCU, but instead we got two empty Oracle DB schemas and installed ODI directly there. The reason why we did not use RCU in this situation is because RCU will force you to create one single Oracle DB schema that will store both ODI Master and Work repositories and this is not a good approach when dealing with large environments. We think that Oracle’s rational on this subject was to simplify certain ODI installs by unifying all in a single place, but again, this removes some of the ODI’s architecture flexibility and complicates the use of complex architectures in the future, like using multiple Work repositories attached to one Master.
So, if we already have ODI Master/Work repositories created, why do we still need RCU? This is because, from ODI 12 version on, we need a third Oracle DB schema that will be used to store the “Common Infrastructure Services” tables that are required for the ODI Standalone agent and the only way to create these tables are using the RCU utility.
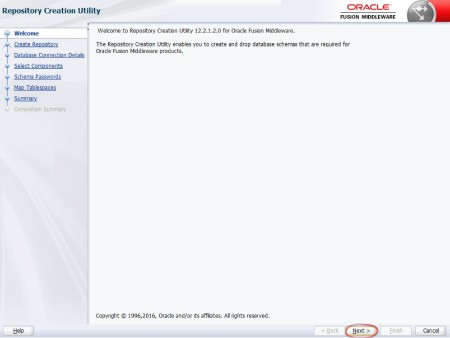
Now that we have set our expectations around RCU, let’s run it. The first screen is just a welcome screen explaining what RCU is about, so just click Next.
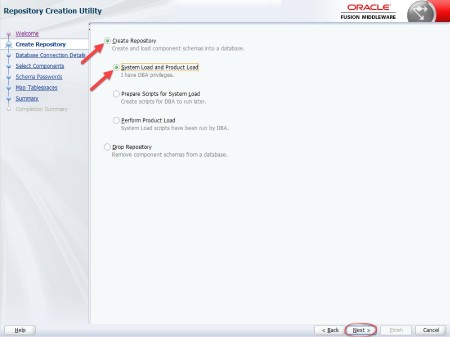
Now let’s select “Create Repository” and “System Load and Product Load”. Just notice that you will be asked for a DBA user in the next steps, since this DBA user will be used to create the necessary database objects (including the DB schema itself) in the new “Common Infrastructure Services” schema. Click Next.
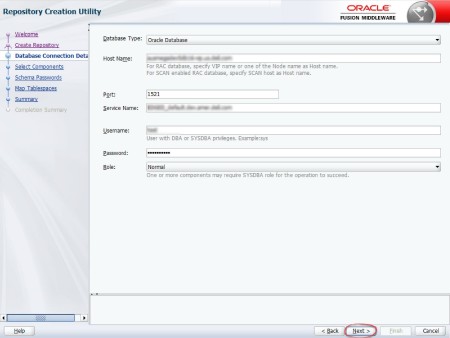
Add the database and DBA information and click next.
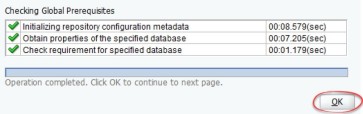
ODI installer will check your information and if everything is ok, all tasks will be green. Select Ok to proceed.
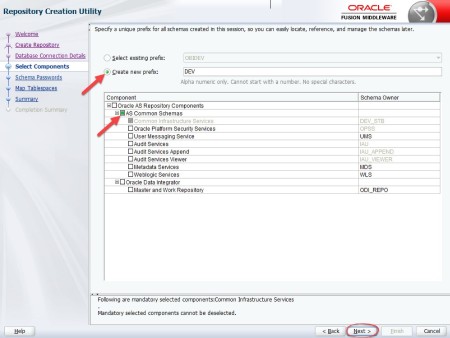
In the next screen is where we may select which components we want RCU to install. We may notice that RCU is able to create several schemas for different components, from ODI to WebLogic. Since we already have our Master and Work repositories created, we just need to select “AS Common Schemas”/”Common Infrastructure Services”. Note here that, for this schema, RCU will create it using what is added in the “Create new prefix” option plus a “_STB” postfix. Click Next.
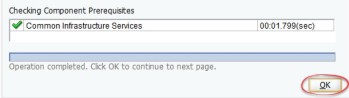
The installer will check the pre-requisites to install and if it is ok, a green check will appear. Click OK.
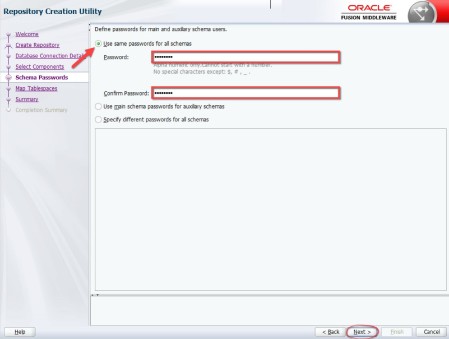
In the next screen you will identify which schema password will be used on the new created DB schema. Add a password and click next.
Define the Default and Temp table spaces that will be used by the new schema and click Next.
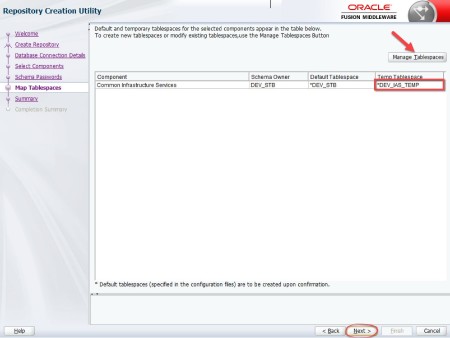
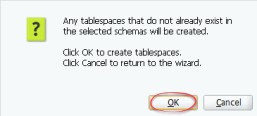
If the table spaces does not exist, they will be created for you. Click Ok.
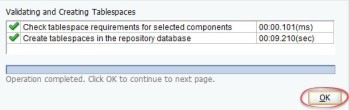
The installer will check once more if everything is okay and also create the necessary table spaces. Click Ok.
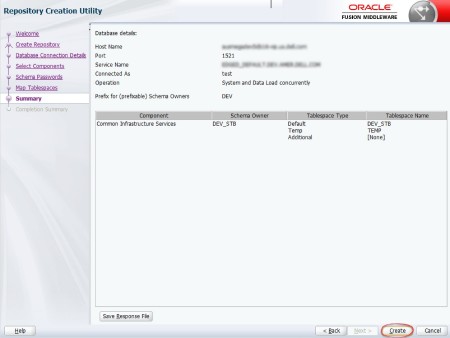
On the next page, we are going to have a Summary on what the installer will do. If everything looks correct, click Create to create the necessary DB objects.
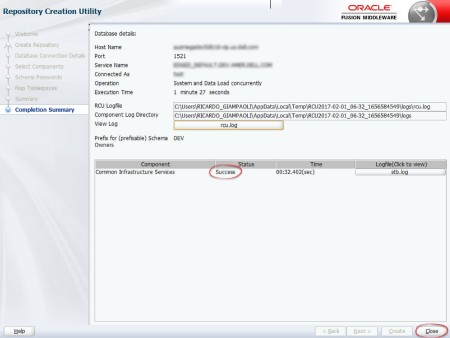
Check the Completion Summary, click close and that’s it! You have successfully created the “Common Infrastructure Services” schema, which is a pre-requisite for the ODI Agent install.
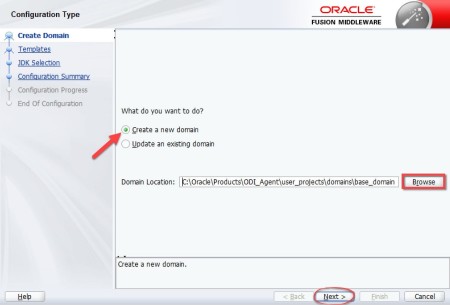
The next step is to run the wizard setup that will configure the ODI Standalone agent for us. Run the Config program on ORACLE_HOME/oracle_common/common/bin/config.cmd. In the first screen let’s create a new domain. In this domain folder is where the ODI Agent batch programs will reside, such as Start/Stop agent. Select a meaningful folder and click next.
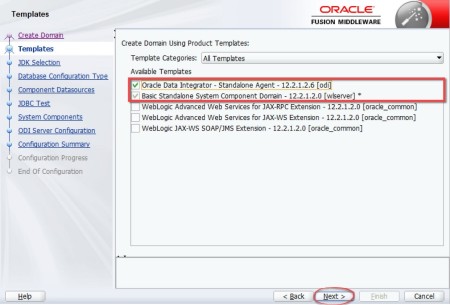
In the next screen you will select “Oracle Data Integrator – Standalone Agent – 12.2.1.2.6 [odi]” and click next. This step will also install some basic Standalone components required for the ODI Agent.
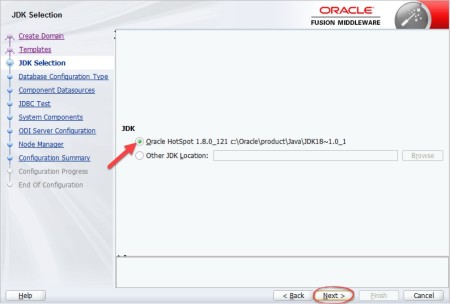
Select a valid JDK location and click next.
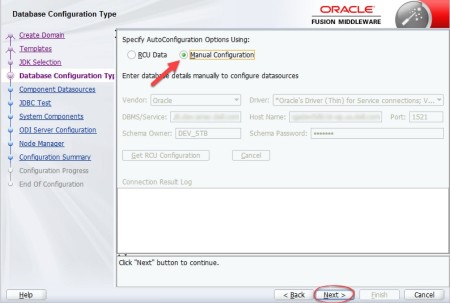
Since we did not create our Master and Work repositories using RCU, we won’t be able to use the “RCU Data” option for Auto Configuration here. It is not a big deal, since we may select “Manual Configuration” and click next.
Here we will need to input all the information related to two schemas: The ODI Master and the “Common Infrastructure Services“. The way that this screen works is tricky and confusing, since there are options that may be typed for all schemas at once. The best way to do it without any mistake is by selecting one of them, add all information, then uncheck and check the other one and add all the information again. Click next.
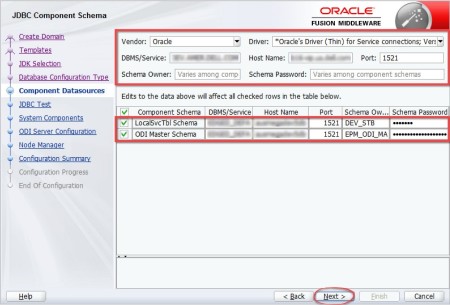
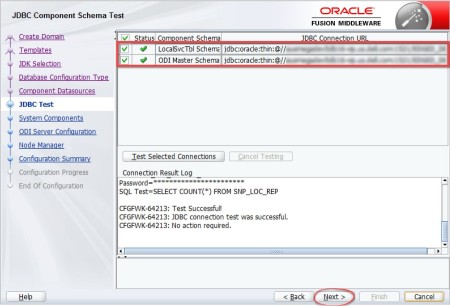
The installer will check the information that was added here and if it is okay, two green marks will be showed in the Status column. Click next.
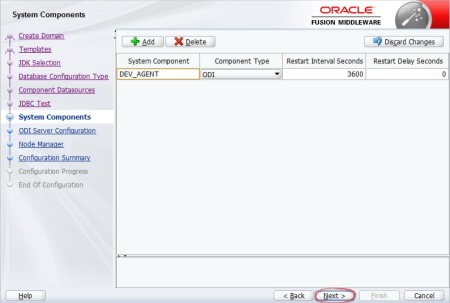
The next screen will be used to define our ODI Agent name. Create a meaningful name here, since this will be used by the ODI users to select on which ODI agent they will run their ETL processes. Click next.
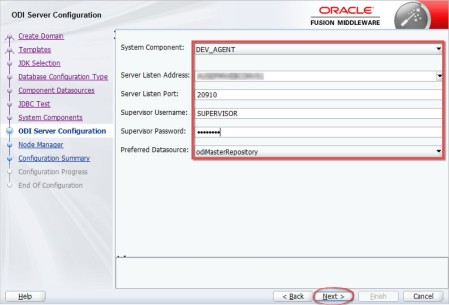
Add the server address, the port and an ODI user/password that has “Supervisor” access. On preferred Data source option, leave it as odiMasterRepository and click next.
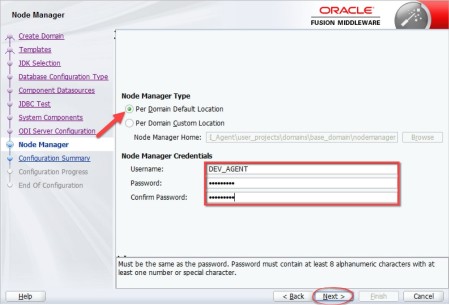
Although we are not going to use our ODI Standalone Agent in a Node Manager object, which would be controlled by WebLogic, we still need to select a type for it and create a new credential. Add any name and a password for it (don’t worry, you will not use it for the ODI Standalone Agent) and click next.
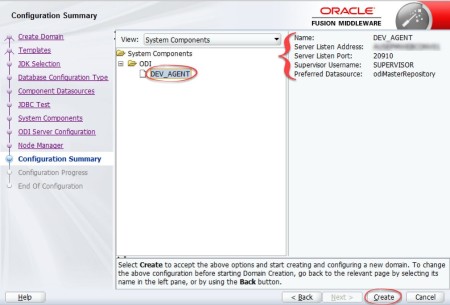
Review the install summary and if everything is ok, just click Create.
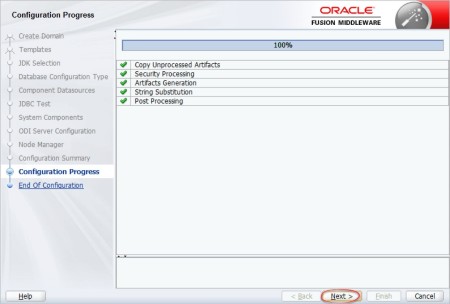
Check all the steps as they turn into green checks and once completed, click next.
That’s the end of the configurations! You have successfully completed the ODI Standalone agent configuration and it is ready to run.
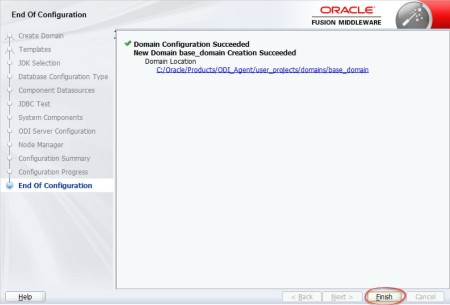
In order to run the ODI agent, open a CMD command, navigate to your base domain folder and run the ODI Agent start program with its name as an input argument: agent.cmd –NAME=DEV_AGENT. Wait a little bit for it to load and when its status gets to “started” it is good to go.

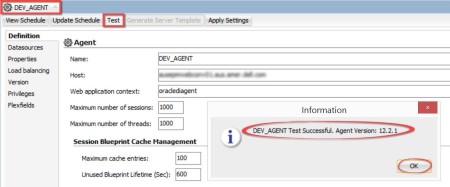
Now that the ODI agent is up and running, we may go to ODI Topology/Agent and double click the ODI agent that you have created. Now we may click on the Test button and see what happens. If everything is correct, you will see an information windows saying that the ODI agent Test was Successful!
Congratulations, now you have an ODI12c Standalone Agent configured. As you can see, we now have some more extra steps to do compared to ODI11g. I hope this post helps you to get prepared for this new kind of installs.
Thanks, see ya!
