Archive for the Java Category

Essbase Statistics DW: How to automatically administrate Essbase using ODI (Part 8: ODI)

Posted in Essbase, Java, ODI with tags , , on February 19, 2021 by Rodrigo Radtke de Souza

Now its time to glue it all together with ODI. ODI is great here because it can work with different technologies without any effort. In our case, we will run the Java codes that we displayed in this series using Java BeanShell Technology.

Although ODI is great to execute any kind of technology code out there, it does not have a good way for you to write and debug your code while you are developing it. So, I always prefer to create the code in an external Java IDE (like Eclipse), test it and copy the “Main” portion of it into an ODI Procedure.

Another advantage to use ODI is that we can get the connection information from topology itself and reuse everywhere within the package using the command on source/target technique, where you define the connection in the command on source tab and get the information in the command on target tab.

To glue all together in ODI is very simple. We may have all the java codes in one procedure with as many steps as we want (depending in what kind of statistics we want to get, in our case, three). Then we may have another procedure that will hold our pivot queries that we use to transform and load the data into our DW tables. Finally, we may even create our own metrics based on the knowledge that we have from Essbase. Down below is one example of metrics that we may retrieve from the stats that we just gathered.

When we put it all in an ODI package, it will look like this. In this example, we also added a send email component just to inform the users about the job completion.

That’s it folks! Next post will be the last one of this series. Stay tuned!

Essbase Statistics DW: How to automatically administrate Essbase using ODI (Part 7: Essbase DW)

Posted in Essbase, Java, ODI with tags , , on February 17, 2021 by Rodrigo Radtke de Souza

Before we glue it all together in ODI, let us organize the data that we just got from Essbase. In the last post we saw that we gathered all the information we needed inside a generic stage table. Although a generic table is great from an extract perspective, we may decide to split, organize, and load this information in some kind of “historical DW tables” which will help us to analyze the data better over time.

For this series of posts, we have 3 different kind of information: DB Statistics, File Statistics and Outline Statistics. Their structure are very different, so we will generate one historical table for each kind of statistic.

Since we created a generic table to hold all extracted information in rows, now we need to PIVOT the data into columns and load it into the historical tables. This can be easily achieved with a SQL like the one below:

First, we define the columns to be pivoted and use a consolidation function on the data column, like (SUM, AVG, MIN, MAX, COUNT…). Then we specify the data to be pivoted and this data must be a constant in the “IN” clause. Finally, this data is loaded to the DW table using a Control Append approach, since we want to keep adding the current statistics to a historical table for an analysis over time.

If we follow this approach for all three metrics that we retrieved from Essbase, we will end up with three DW tables, like the ones below:

File statistics:

Outline statistics:

DB statistics:

That is all for today! See you!

Essbase Statistics DW: How to automatically administrate Essbase using ODI (Part 6: Java codes)

Posted in Essbase, Java, ODI with tags , , on February 9, 2021 by Rodrigo Radtke de Souza

Hi all, let us demonstrate some examples of Java codes that you may use to retrieve statistics out of Essbase. Since we want to store those stats in an Oracle table, let us begin with an example of how to connect to an Oracle DB, which is simple, as we just need the DB URL, username, and password. Below is how we may create the connection. We also have a prepare statement that we will use to do inserts in our Oracle table.

Since we have a generic table, we can have just one prepare statement and use it to insert all kind of stats there.

Connecting to Essbase is also easy, the only additional information is that you also need to pass the Provider Service, which may be “Embedded” or by Provider Service. Here we are basically doing a sign in to the provider service and then select the OLAP server that we want to use.

Now let us see the first code to get some cube stats. First, we get all the cubes from all the apps and for each cube we get its properties (which is an array in a Key and a Value format). This information is added to the prepare Statement and executed (inserted) into the DB.

The result will be something like this:

Let us jump to a second example. In Java we can issue any Maxl command using the “IEssMaxlSession” class. The result set contains columns and rows, similar with what we get in EAS. Then we need to loop through the rows and get the columns that we need. This information is also added to the prepare Statement and executed (inserted) into the DB.

The result will be something like below.

The last example is how we can get stats from the Essbase outline. We can get member information using IEssMemberSelection with a custom query or find the member directly in the outline using find member. The results contain a set of members that we may loop and analyze its properties. In this case we decided to categorize the results by its storage type.

Again, the result will be something like the one below.

That is it for today. Next post I will show you how you can glue it all together with ODI. See you soon!

Essbase Statistics DW: How to automatically administrate Essbase using ODI (Part 5: Automating using Java Essbase API)

Posted in Essbase, Java, ODI with tags , , on February 8, 2021 by Rodrigo Radtke de Souza

Hi all! Let us talk now about how we can automate this stat gathering using Java Essbase API. Java is the key technology here since it can easily connect and manipulate Essbase through its API. It also can connect to Oracle Database to store our results, run OS commands and more all in one single code. Java is also great since it may be easily deployed to ODI using Procedures and scheduled using ODI Operator. All in all, combining ODI and Java code creates a powerful and seamlessly integration going beyond the database boundaries.

Let us begin with some Java Essbase API basics. The main goal is to develop one single code that will connect in Essbase, retrieve the statistics information and load that in the Oracle database.

Essbase API is very similar with what we see in EAS, in the sense that the structure of the classes follows the same architecture as in a Essbase server (Server->App->Cube->Otl), which makes it easy to find out what you are looking for when looking at the API documentation.

Since we will store this information in an Oracle table, we will also need to know a little bit about Oracle Java API, but luckily this one is straight forward.

With those two sets of APIs, we are good retrieve all the information that we need from Essbase. Each stat has its own number of columns and metrics, so if we create one table for each kind of structure it will be very tricky to maintain and harder to create any kind of generic code. The best way to extract information is to have just one table where we have the properties in the rows instead of columns, this way we have just one structure for all kind of information, no matter the number of columns that returns and we may create generic code around it. Our final table would look like below.

That is it for this post. Next one I will share some examples on how to connect to Oracle DB, Essbase and how to retrieve some stats out of it. Stay tuned!

Playing with ODI and Groovy – Part 4 – Exporting/Importing ODI Scenarios with SDK

Posted in GROOVY, Java, ODI SDK with tags , , on April 9, 2019 by Rodrigo Radtke de Souza

Hi all, I’m back with the continuation of this Groovy and ODI series. Last post we saw how to find the different scenarios between two environments. Today we will look on how we may export those different scenarios from our source repository and how to import them in our target repository. We will do a two-step operation: first we will export the different ODI objects from our source repository as XML files into a folder and then we will import those xml files into our target repository.
Our code is very similar to the one that we did for post 3, but we will need to enhance it a little bit. First thing that we will have to change in our code is the function that creates the list of objects. In the previous post, we were just adding the name of the scenarios to the list. Now we will need to store the object itself in the list, since we will need to have the ODI object (scenario) to have it exported.

def listObjects (odiInstance,odiClass,listOfObjects) {
	odiObjects = odiInstance.getTransactionalEntityManager().getFinder(odiClass).findAll().sort{it.name}
	for (Object odiSingleObject: odiObjects)
		listOfObjects.add(odiSingleObject)
}

Also, we will need to create a variable that will indicate the path where the objects will be temporarily exported.

exportPath = "C:\\Odi"

One import thing that we will need to change is how to compare the objects. In the previous post, we were simply comparing them, as they were strings, which was ok for our propose there. However, now we cannot simple compare the java objects because they will be different even if they represent the same scenario name/version. They are considered “different” because they came from different environments and logically, they represent different ODI entities.

diffScenarios = []
	for (Object odiSingleObject: sourceScenarios)
		if (targetScenarios.find {targetScenarios -> targetScenarios.getName() == odiSingleObject.getName() && targetScenarios.getVersion() == odiSingleObject.getVersion()}.equals(null))
			if (odiSingleObject.getName().startsWith('TEST'))
				diffScenarios.add(odiSingleObject)

I’m basically doing three tests to see if the source scenario will be migrated or not: first I compare its name, than its version and finally if its name starts with TEST (this last step does not need to be done if you want to get the complete scenario list). Next step I just print the scenarios names and versions that will be exported/imported:

println("List of ODI Scenarios that will be migrated")
		for (Object singObject: diffScenarios)
			println(singObject.getName() + "_" + singObject.getVersion())

Now comes the new code:

encode = new EncodingOptions();
transSource = sourceOdiInstance.getTransactionManager().getTransaction(new DefaultTransactionDefinition());
	exportService = new ExportServiceImpl(sourceOdiInstance);
	for (Object singObject: diffScenarios)
		exportService.exportToXml(singObject, exportPath, true, false, encode)

Export objects in ODI SDK is very straight forward: you need to inform which scenarios you want to export (in our case, all objects that were stored in diffScenarios array), the path where the object will be exported and the encode option that will be used. In this case, I just went ahead with the default encode options.

Importing objects is also easy, but similarly to a database, you need to explicitly commit your actions to make it effective in the target repository. Also, for the sake of simplicity, we will import all new scenarios under “root”, but we could explicitly say under which ODI objects we would want to have it imported to:

tm = targetOdiInstance.getTransactionManager()
	transTarget = tm.getTransaction(new DefaultTransactionDefinition());
	importService = new ImportServiceImpl(targetOdiInstance);
	for (Object singObject: diffScenarios)
	{
		println(exportPath+"\\SCEN_"+singObject.getName() + "_Version_" + singObject.getVersion()+".xml")
		importService.importObjectFromXml(ImportServiceImpl.IMPORT_MODE_SYNONYM_INSERT_UPDATE,exportPath+"\\SCEN_"+singObject.getName() + "_Version_" + singObject.getVersion()+".xml", true, null, true)
	}
	tm.commit(transTarget)

Once you run the job, you will get the following:

1

Our target repository already had TEST2, so that’s why its not in the list. When the user connects to the target repository, he will see the following:

2

That’s it for today folks! Hope you like it! See you soon! The code for part 4 can be found here.

Playing with ODI and Groovy – Part 3 – Comparing ODI Scenarios from two environments

Posted in GROOVY, Java, ODI, ODI SDK with tags , , on February 1, 2019 by Rodrigo Radtke de Souza

Hi all!

Now that we can connect to any ODI environment and list all sorts of ODI objects, its time to compare them and find its differences. Today’s example will do a simple check on ODI Scenarios between two environments based on its name and version. We will increment our code logic in later posts by adding different types of filters to make our code more efficient, but as for now let’s do the basic stuff just for us the get the main idea.

One important thing to notice here is that we will compare the objects only by its name and version number, not by its content. In other words, if you have the same ODI object regenerated with the same version number over and over again, this code won’t probably work in the way you are expecting too, since it may tells you that SCENARIO_001 is the same as SCENARIO_001, but in fact it may not be if you regenerated the source scenario more than once.

Let’s pause and talk briefly about ODI Scenario versions

Just a small comment on using different ODI scenario version numbers whenever the code has changed: I’m a huge fan of that and I always do a big effort to implement this concept in every project that I work on. The concept is very simple, but a lot of people don’t do it:

  • Every time that the scenario leaves the DEV environment to be imported in a subsequent environment, it should have an incremental version number.

For example: when you create a new ODI scenario in DEV, you may keep regenerating it repeatedly with the same number, let’s say 1_00_00. After some time, you will deploy it to test environment using version 1_00_00. Now you need to do some code fix or enhancement to it. Instead of regenerate it as 1_00_00 and move it forward, you should increment a version number, like 1_00_01. Your test environment will have both scenarios, but you may call them always using “-1” in the Load Plans or Scenario calls in procedures, which will ensure that ODI will always use the latest one (1_00_01). You may end up with several test interactions/fixes and end up with 10 versions of the same scenario, but that is fine. Once test finishes, you move just the latest one to Production, which will be 1_00_10.

Some people don’t like this approach and their main argument is that it creates a bunch of “repetitive” scenarios over the environments. However, they don’t realize (at first) that this approach creates a lot of benefits over time, such as:

  • Traceability: if you have a defect tracking tool, you may add a comment in the defect (or even in the ODI scenario comments) identifying which defect generated which scenario version, so you may answer all those answers like: “is the code fix xxxx that was generated in version xxxx already in test environment?”. It’s impossible to answer that question if the version is always 001;
  • Control: you may easily see how many defects/interactions a particular ODI scenario had in that development cycle and who did each one of them, so you may have a sense if a code (or even a developer) is having problems to deliver things properly;
  • Roll back is a breeze: if you add something to production but needs to roll it back due to an unexpected behavior, you just remove the latest scenario and that’s it. ODI will pick the old scenario and you are good to go. No need to export the ODI scenario first as a backup, then import it again in case of any problem;
  • Number of scenarios is manageable: if someone still argues about the number of similar objects over the environments, we may always adopt “the last three” versions approach, where we maintain only the last three versions of a scenario in each environment. Three is a good number because its very unlikely that you will want to rollback your code to older than three versions.

Getting back to our main topic

Getting back to our post (and really hoping that you start to follow the incremental version approach from now on, if you dont already), lets change our code to connect to two repositories instead of one.  We already have a code to connect to a source repository, so its just a matter to duplicate it to a target repository (or you may create a function as well to reuse some of the code there):

targetUrl = "jdbc:oracle:thin:@YOUR_SERVER_INFO"
targetSchema = "DEV_ODI_REPO"
targetSchemaPwd = "XXXXXXXX"
targetWorkrep = "WORKREP"
targetOdiUser = "XXXXXXXX"
targetOdiUserPwd = "XXXXXXXX"

targetMasterInfo = new  MasterRepositoryDbInfo(targetUrl, driver, targetSchema, targetSchemaPwd.toCharArray(), new PoolingAttributes())
targetWorkInfo = new WorkRepositoryDbInfo(targetWorkrep, new PoolingAttributes())

targetOdiInstance = OdiInstance.createInstance(new OdiInstanceConfig(targetMasterInfo, targetWorkInfo))
targetAuth = targetOdiInstance.getSecurityManager().createAuthentication(targetOdiUser, targetOdiUserPwd.toCharArray())
targetOdiInstance.getSecurityManager().setCurrentThreadAuthentication(targetAuth)

Next thing is that we will slightly change our listObjects function to receive a list object that will hold our source and target ODI scenarios:

def listObjects (odiInstance,odiClass,listOfObjects) {
	odiObjects = odiInstance.getTransactionalEntityManager().getFinder(odiClass).findAll().sort{it.name}
	for (Object odiSingleObject: odiObjects)
		listOfObjects.add(odiSingleObject.getName() + " - " + (odiSingleObject.getClass()==OdiScenario.class? odiSingleObject.getVersion() : "NA") )
}

We will call it for both source and target connections:

println("Creating Source Scenarios List")
sourceScenarios = []
listObjects (sourceOdiInstance,OdiScenario.class,sourceScenarios)

println("Creating Target Scenarios List")
targetScenarios = []
listObjects (targetOdiInstance,OdiScenario.class,targetScenarios)

Now that we have both lists, is just a matter to compare those. Its very easy to compare and even filter the results in Groovy. The code below will get all ODI scenarios that exists in the source environment but do not exists in target and will filter this list to retrieve only the scenarios that begins with TEST. This kind of filtering is useful, since sometimes you just want to search for certain scenarios, not all of them (again, we will increase the filtering options on later posts):

diffScenarios = (sourceScenarios-targetScenarios).findAll(){sourceScenarios -> sourceScenarios.toUpperCase().startsWith('TEST')}
println("The difference (with the filter) is:")
println(diffScenarios)

If we execute our code, the result will be something like this:

post1

TEST2 scenario was already imported in my target environment, so the result says that TEST1/TEST3/TEST4 exists in source but not in target.

That’s it for today folks. Next post we will learn how do we get this list of different objects and import them in our target environment. If you want the code that was presented in this post, please click here.

Thanks!

Playing with ODI and Groovy – Part 2 – Listing all kinds of ODI objects

Posted in Java, ODI, ODI SDK with tags , , on January 22, 2019 by Rodrigo Radtke de Souza

Today’s post is short as we will learn how to list any kind of ODI objects using ODI SDK. Although it is simple, it can be used for several different reasons in your daily activities and we will use it to list all the existing scenarios, load plans and folders in our ODI utility. ODI SDK has a very simple way to search for its objects as we can see below:

odi.getTransactionalEntityManager().getFinder(odiClass).findAll()

From “odi” instance object, we get an Entity Manager, which provides the methods to interact with the persistence context in order to make CRUD (Create, Read, Update, Delete) operations against IOdiEntity instances. ODI entity is any object that reside in an ODI repository and so is capable of being persisted (like scenarios, load plans, folders, etc).

From Entity Manager, we may get a Finder, that will receive an ODI Class as a parameter and will return a collection of all objects that belongs to that class. You can “find” any object that implements the IOdiEntity interface. Some examples of ODI classes that you can use are:

  • OdiDataStore
  • OdiFolder
  • OdiIKM
  • OdiLKM
  • OdiLoadPlan
  • OdiLogicalSchema
  • OdiModel
  • OdiPackage
  • OdiPhysicalSchema
  • OdiProcedure
  • OdiScenario
  • OdiScenarioFolder
  • OdiSession
  • OdiSessionFolder
  • OdiUser

So, lets create a procedure in our code that will list all the correspondent ODI objects from a given ODI instance object and a class:

def listObjects (odi,odiClass) {
	odiObjects = odi.getTransactionalEntityManager().getFinder(odiClass).findAll().sort{it.name}
	if (odiObjects.size() > 0) {
		for (int i = 0; i < odiObjects.size(); i++) {
			odiSingleObject = odiObjects.toArray()[i]
			println(odiSingleObject.getName() + " - " + (odiSingleObject.getClass()==OdiScenario.class? odiSingleObject.getVersion() : "NA") )
		}
	}
}

A couple of things about this code. You can see that I’m sorting all the objects that will be displayed by its name. But if I needed something more complex, like sort by name and version number, I could write something like this:

sort {a, b -> a.name.toLowerCase() <=> b.name.toLowerCase() ?: a.version  b.version}

However, this sort wouldn’t work for all classes, since we are using VERSION, which may not be applicable to all ODI objects, like folders. On those cases, we may do a simple check to see if that object belongs to a specific class or not:

odiSingleObject.getClass()==OdiScenario.class? odiSingleObject.getVersion() : "NA"

This one is checking if the current class is OdiScenario. If true, then it will get its version value, otherwise it will just get “NA”.

To run our procedure, it is just a matter to do something like this:

try {
	listObjects (sourceOdiInstance,OdiScenario.class)
	listObjects (sourceOdiInstance,OdiLoadPlan.class)
	listObjects (sourceOdiInstance,OdiScenarioFolder.class)
}
catch (e){
	println(e)
}

The result will be a print of the list of objects:

1

2

That’s it for today folks. You can look at the code in this link (I’ll add one for each post, so its easier for the readers to follow).

See ya!

Playing with ODI and Groovy – Part 1 – Getting things ready

Posted in ETL, GROOVY, Java, ODI, ODI SDK with tags , , , on January 8, 2019 by Rodrigo Radtke de Souza

Hi all, how are you doing? It has been a long quiet period here in the blog and the reason is always the same: too much work, projects, personal things and so on. To “force” myself in getting some time to write in the blog (while I still have the “new year” feeling), I’ll start this series of ODI and Groovy development. Not sure how many posts I’ll write, but it will be a step by step on how to create your own ODI utilities using Groovy scripts. We will start from looking on the necessary tools that we will need to use, and the final goal is to have an ODI utility to solve a specific ODI developers’ problem. Let’s start then.

So, what is the problem that we are trying to solve?

ODI developers knows that, besides all their project’s problems, they need to deal with boring/repetitive/error prone daily activities that are often underestimated by people and that may cause big issues over time in large ODI environments. One of those simple (yet boring) tasks is to keep ODI environments in sync regarding to ODI scenarios. How to make sure that all ODI scenarios in my DEV environment were already migrated to TEST or PROD? What should have been deployed but was not? How can I see a list of those differences and figure out who/when that was done?

Almost every time that I need to answer one of those questions, I go to ODI repository metadata tables and start to write down queries to get the necessary information and compare them between the different environments. Although it works, it is time consuming, its manual and I need to have access to read the ODI metadata tables, which is not possible in a lot of places due to security reasons.

So, thinking about all that, I decided to create my own ODI utility that can connect to different ODI repositories, compare what is different between them and deploy any missing scenario that I wish to deploy. Although the idea sounds simple, it’s a pretty useful tool that may save us a lot of time and it can be reused in any project that you work on. Also, it can serve as a base for you to create any ODI utility that you may want to, so you can make your job more productive and automate all the boring/manual tasks.

Ok, you have convinced me. So, what do I need to get it done?

As the title of this post mentions, you will need ODI SDK libraries (they come as part of ODI install), Groovy/Java and a tool to write down your code. I choose Eclipse IDE because I was more familiar with the tool from my past Java developer days, but you can use anything that you want. In fact, ODI already comes with a Groovy editor that you could use, however it is a very basic editor that won’t give you a lot of the cool stuff that all those modern Groovy/Java IDEs can provide to you, like code completion, automatic library imports and so on.

You mentioned Groovy/Java. Why?

That’s a good question, since some people get confused about those two languages. As I’ve written before, in the way past, I used to adventure myself in Java code as a developer, which got very limited to a few scripts now and then once I started to work with data integration. At first, I thought about creating the utilities all in pure Java (due to my background), but ODI already comes with Groovy support, so I decided to look at it. Although I knew what Groovy concept was, I had never worked with it, so I had to do some study before start dealing with it.

Groovy is (a resume from its site): a powerful, optionally typed and dynamic language, with static-typing and static compilation capabilities, for the Java platform aimed at improving developer productivity thanks to a concise, familiar and easy to learn syntax. It integrates smoothly with any Java program, and immediately delivers to your application powerful features, including scripting capabilities, Domain-Specific Language authoring, runtime and compile-time meta-programming and functional programming.

Some key points that we should take from this resume and that drove my decision to use Groovy was:

  • Simplicity and Dynamicity: you can write the same code in Groovy compared to Java with less line codes, so it gets faster for you to code and read. Since its simpler, its great for writing concise and maintainable automation tasks/scripts (which is our goal here).
  • Smooth Java integration: Seamlessly and transparently integrates and interoperates with Java and any third-party libraries, which means that it is very easy for Java developers to learn and use Groovy.

There are other benefits/drawbacks about using Groovy over pure Java, but since ODI supports Groovy and its simpler to code (specially to create small automation scripts), those seemed good compelling reasons for me to use it.

Installing Eclipse with Groovy support

I’m going to describe here the steps to have Eclipse working with Groovy, so if you are using another IDE or even coding directly in ODI Groovy editor, you may skip this part. Installing Eclipse (Eclipse IDE for Java Developers) is very straight forward. You just need to go to Eclipse site and install it. However, Eclipse is aimed for Java development, not Groovy, which needs additional steps to get it installed in Eclipse. So, I read this site and replicated step 3, installing the “Groovy Eclipse plug-in” manually. I also executed step 6 just to make sure that my Eclipse/Groovy install was correct.

post1

Connecting to ODI

Let’s create a script that simply connects to an existing ODI instance, just to validate our Eclipse/Groovy/ODI SDK installation. First, we need to import the necessary Jar files to our Groovy project in Eclipse. Right click and select “Build Path/Configure Build Path”:

post2

On Libraries, select “Add External Jars”:

post3

There are some Jars that you will need to import to make it work. Here is the list:

  • Go to “Path to your ODI install\odi\sdk\lib” and import all Jar files from that folder;
  • Go to “Path to your ODI install\oracle_common\modules\oracle.jdbc” and import ojdbc8.jar from there;
  • Go to “Path to your ODI install\oracle_common\modules” and import all javax* jar files. Those are only needed to clear some weird warning messages that appears when connecting to ODI repository using Eclipse;

Now one important step that needs to be done if you are using Eclipse and ODI SDK Jar files. Once you import the above list, click on “Groovy Libraries” and click in “Remove” as below:

post4

This “removal” will remove the Groovy Libraries that were added as part of Groovy plugin install that we did before.  This removal is needed because ODI SDK libraries already contains Groovy libraries and they may conflict if they are in different versions. Below is an example of what happens if you don’t do this removal step in Eclipse.

post6

The code to connect o an ODI instance is very simple as we can see below. It imports a few libraries, create some variables that will be used as the login information and gets authenticated in the Master/Work repository.


import java.util.logging.Logger;
import java.util.logging.Level;
import oracle.odi.core.OdiInstance;
import oracle.odi.core.config.MasterRepositoryDbInfo
import oracle.odi.core.config.OdiInstanceConfig
import oracle.odi.core.config.PoolingAttributes
import oracle.odi.core.config.WorkRepositoryDbInfo
import oracle.odi.core.security.Authentication

logger = Logger.getLogger("oracle.jdbc");
logger.setLevel(Level.SEVERE);

sourceUrl = "jdbc:oracle:thin:@YOUR_SERVER_INFO";
driver = "oracle.jdbc.OracleDriver";
sourceSchema = "DEV_ODI_REPO";
sourceSchemaPwd = "XXXXXXXX"
sourceWorkrep = "WORKREP";
sourceOdiUser = "XXXXXXXX";
sourceOdiUserPwd = "XXXXXXXX";
sourceMasterInfo = new MasterRepositoryDbInfo(sourceUrl, driver, sourceSchema, sourceSchemaPwd.toCharArray(), new PoolingAttributes());
sourceWorkInfo = new WorkRepositoryDbInfo(sourceWorkrep, new PoolingAttributes());

sourceOdiInstance = OdiInstance.createInstance(new OdiInstanceConfig(sourceMasterInfo, sourceWorkInfo));
sourceAuth = sourceOdiInstance.getSecurityManager().createAuthentication(sourceOdiUser, sourceOdiUserPwd.toCharArray());
sourceOdiInstance.getSecurityManager().setCurrentThreadAuthentication(sourceAuth);

println("Connected to ODI! Yay!")

When we execute the code (Run/Run As/Groovy Script), we can see that it connects successfully to our ODI instance. You may also decrease the ODI log level if you don’t wish so many details, but as for now, I’ll leave it as is.

post5

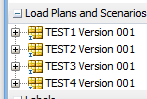
That’s it folks for our first post. Next one I’ll talk about how to get all ODI scenarios, load plans and folders and display it in a tree component, similarly on what we have in ODI Operator.

See ya!

Automating Essbase Copy Outline Operation using Java API

Posted in ACE, BSO, Cubes, Essbase, Hacking, Hyperion Essbase, Java, Migration, Oracle with tags , , , , , , on August 9, 2017 by RZGiampaoli

Hi guys how are you? Did you guys ever tried to automate the process of coping a cube outline from one application to another?

Well, there’s an easy way to do that. Basically you copy the .otl from the server file system over the other cube. The problem is that if the cube is not empty, the database becomes corrupted since we just replaced an .otl file for another strange .otl file (no restructure happened).

Then if you want to copy the outline to an existing cube (that has data) this is not a solution.

The thing is, the only two possible ways to do what we want is the EAS “Save as” operation and the migration wizard. These both operations work because they copy the .otl file as .otn and then run a restructure in the database. The restructure “synchronize” the cube with the new outline, making the process safe for a cube that has data on it.

The problem is, none of these can be automated and there’re no way to do this operation using Maxl or EssCmd.

In fact, even using the Java API, it’s hard to figure out how to do that because all the copy methods seem to copy all kind of objects but the outline.

The good news is, we figured out a way to replicate the “Save as” operation using the Java API after hours of frustration and tears…

Here we go:

Save As Java code

The code is really simple. We need to connect in the essbase server, lock the target outline (the one we’ll overwrite) and then copy the outline from one application to another. To do that we are going to use the functions “lockOlapFileObject” and “copyOlapFileObjectToServer”.

This process that we just described will create an .otn file in the target cube. Now comes the great catch of this code (that is not documented anywhere):

If we open the target outline in EAS we will still see the old metadata. To commit the changes, we need to perform a restructure to merge the new outline (.otn) with the old one (.otl) updating the metadata.

To do that we are going to use the functions in the class “IEssCubeOutline” to “open”, “restructureCube” and “close” the target outline.

That is it. This process will do exactly what the “Save As” in EAS does, which means that you can copy outlines from one application to another even when the target database contains data.

I hope you guys enjoy and see you soon.

Kscope 17 is approaching fast!!! And we’ll be there!

Posted in ACE, Data Warehouse, Essbase, Hyperion Essbase, Java, Kscope 17, ODI, ODI Architecture, Oracle, Performance, Tips and Tricks, Uncategorized with tags , , , , , , , , on June 8, 2017 by RZGiampaoli

Hi guys how are you? We are sorry for being away for so much time but this year we have a lot of exiting things going one, then let’s start with what we’ll be doing at Kscope 17!

This year we’ll present 2 sessions:

Essbase Statistics DW: How to Automatically Administrate Essbase Using ODI (Jun 28, 2017, Wednesday Session 12 , 9:45 am – 10:45 am)

In order to have a performatic Essbase cube, we must keep vigilance and follow up its growth and its data movements so we can distribute caches and adjust the database parameters accordingly. But this is a very difficult task to achieve, since Essbase statistics are not temporal and only tell you the cube statistics is in that specific time frame.

This session will present how ODI can be used to create a historical statistical DW containing Essbase cube’s information and how to identify trends and patterns, giving us the ability for programmatically tune our Essbase databases automatically.

And…

Data Warehouse 2.0: Master Techniques for EPM Guys (Powered by ODI)  (Jun 26, 2017, Monday Session 2 , 11:45 am – 12:45 pm)

EPM environments are generally supported by a Data Warehouse; however, we often see that those DWs are not optimized for the EPM tools. During the years, we have witnessed that modeling a DW thinking about the EPM tools may greatly increase the overall architecture performance.

The most common situation found in several projects is that the people who develop the data warehouse do not have a great knowledge about EPM tools and vice-versa. This may create a big gap between those two concepts which may severally impact performance.

This session will show a lot of techniques to model the right Data Warehouse for EPM tools. We will discuss how to improve performance using partitioned tables, create hierarchical queries with “Connect by Prior”, the correct way to use multi-period tables for block data load using Pivot/Unpivot and more. And if you want to go ever further, we will show you how to leverage all those techniques using ODI, which will create the perfect mix to perform any process between your DW and EPM environments.

These presentations you can expect a lot of technical content, some very good tips and some very good ideas to improve your EPM environment!

Also I’ll be graduating in this year leadership program and this year we’ll be all over the place with the K-Team, a special team created to make the newcomers fell more welcome and help them to get the most of the kscope.

Also Rodrigo will be at Tuesday Lunch and Learn for the EPM Data Integration track on Cibolo 2/3/4.

And of course we will be around having fun an gathering new ideas for the next year!!!

And the last but not least, this year we’ll have a friend of us making his first appearance at Kscope with the presentation OBIEE Going Global! Getting Ready for More Than +140k Users (Jun 26, 2017, Monday Session 4 , 3:15 pm – 4:15 pm).

A standard Oracle Business Intelligence (OBIEE) reporting application can hold more or less 1,200 users. This may be a reasonable number of users for the majority of the companies out there, but what happens when an IT leader like Dell decides to acquire another IT giant like EMC and all of their combined 140,000-plus users need to have access to an HR OBIEE instance? What does that setup looks like? What kind of architecture do we need to have to support those users in a fast and reliable way?
This session shows the complexity of Dell’s OBIEE environment, describing all processes and steps performed to create such environment, meeting the most varied needs from business demands and L2 support, always aiming to improve environment stability. This architecture relies on a range of different technologies to support that huge amount of end users such as LDAP & SSL, Kerberos, SSO, SSL, BigIP, Shared Folders using NAS, Weblogic running into a cluster within #4 application servers.
If the challenge was not hard enough already, all of this setup also needed to consider Dell’s legacy OBIEE upgrade from v11.1.1.6.9 to v11.1.1.7.160119, so we will explain what were the pain points, considerations and orchestration needed to do all of this in parallel.

Thank you guys and see you there!

kscope17logo-pngm